Setting Ubuntu 24.04 on ASUS TUF A14
21 Dec 2024Setting up Linux on a modern laptop can be a challenging process. Often, it takes time for Linux distributions to roll out updates for the latest hardware drivers. As a result, the out-of-the-box experience when installing popular distributions is not great. Only a small percentage of users are interested in running fully-fledged Linux system on laptop segment, which may be the reason why many laptop vendors don’t prioritize Linux support.
In this post, I’ll share how to set up ASUS TUF 2024 A14 to run Ubuntu 24.04 LTS. This machine is equipped with a Ryzen HX370 processor, an Nvidia 4060 GPU, and maxed-out specifications. It’s a good machine for the price, particularly in the Indian market, and I’ve been impressed with its performance.
Challenges with Linux on Modern Laptops
One of the main hurdles with installing Linux on modern laptops is driver compatibility. Popular Linux distributions often lag in supporting cutting-edge hardware, especially when it comes to GPUs, Wi-Fi, and power management features. This delay can lead to frustrating issues like poor battery life, missing functionality, or even an inability to boot properly. This often push people to opt old hardwares (laptop segment) to run linux.
Why this Post?
Before buying this laptop, I researched its Linux compatibility and how challenging it would be to set up and run a Linux distribution smoothly. I didn’t want a system that works inconsistently. The ASUS TUF 2024 A14 stood out to me for its excellent specifications. Its combination of Ryzen HX370 and Nvidia 4060 ensures top-notch performance for both productivity tasks and gaming. However, as expected, setting it up for Linux required some extra effort to ensure everything worked properly. While there are utilities like asusctl and supergfxctl for Linux support, there are still challenges to get them working seamlessly. This post serves as a quick referece for those interested to setup Ubuntu 24.04 on this machine.
Steps to Set Up Ubuntu 24.04 LTS
I have used Ubuntu 24.04 due to it’s LTS support. Follow these steps:
Ubuntu Installation Steps
- Boot Ubuntu 24.04 using USB: Boot Ubuntu 24.04 using USB and add the following boot parameter by editing grub entry for failsafe graphics(press e and add the following on the line that start with linux ):
nouveau.modeset=0 -
Install Ubuntu: During installation, avoid installing the Nvidia driver (if secureboot is enabled).
-
Reboot: Restart the system and select failsafe mode again with
nouveau.modeset=0. - Enable networking and drop to root:
sudo apt-get update sudo apt-get install linux-image-6.11.0-1010-oem sudo apt-get install linux-headers-6.11.0-1010-oem sudo reboot - Boot Normally: After reboot, install Nvidia drivers:
sudo ubuntu-drivers list
sudo ubuntu-drivers install
Set a temporary password for MOC key installation. This step is required to sign and validate the new drivers with a Machine Owner Key (MOC), ensuring they work with Secure Boot enabled. There’s no need to disable Secure Boot during this process.
-
Virtualization Setup
Install virtualization tools:
sudo apt install -y qemu-kvm libvirt-daemon-system libvirt-clients bridge-utils virt-manager virtiofsdAdd your user to the relevant groups:
 sudo addgrp $USER libvirt
 sudo addgrp $USER kvm
Install dependencies:
 sudo apt-get install git
 sudo apt-get install curl
Configure
supergfxdto enable vfio:This configuration is required only if you plan to pass through the Nvidia GPU to KVM for virtualization purposes. Follow these steps to clone and install
supergfxctlfrom GitLab:sudo apt-get install git build-essential cmake cd ~ git clone https://gitlab.com/asus-linux/supergfxctl.git cd supergfxctl make sudo make installAfter installation, update the
supergfxdconfiguration file withvfio_enable: true:sudo nano /etc/supergfxd.conf{ "mode": "Integrated", "vfio_enable": true, "vfio_save": false, "always_reboot": false, "no_logind": false, "logout_timeout_s": 180, "hotplug_type": "None" } -
Customization
sudo apt install gnome-shell-extension-managerGnome extensions
Install dependencies:
 sudo apt install lm-sensors
 sudo sensors-detect --auto
Results
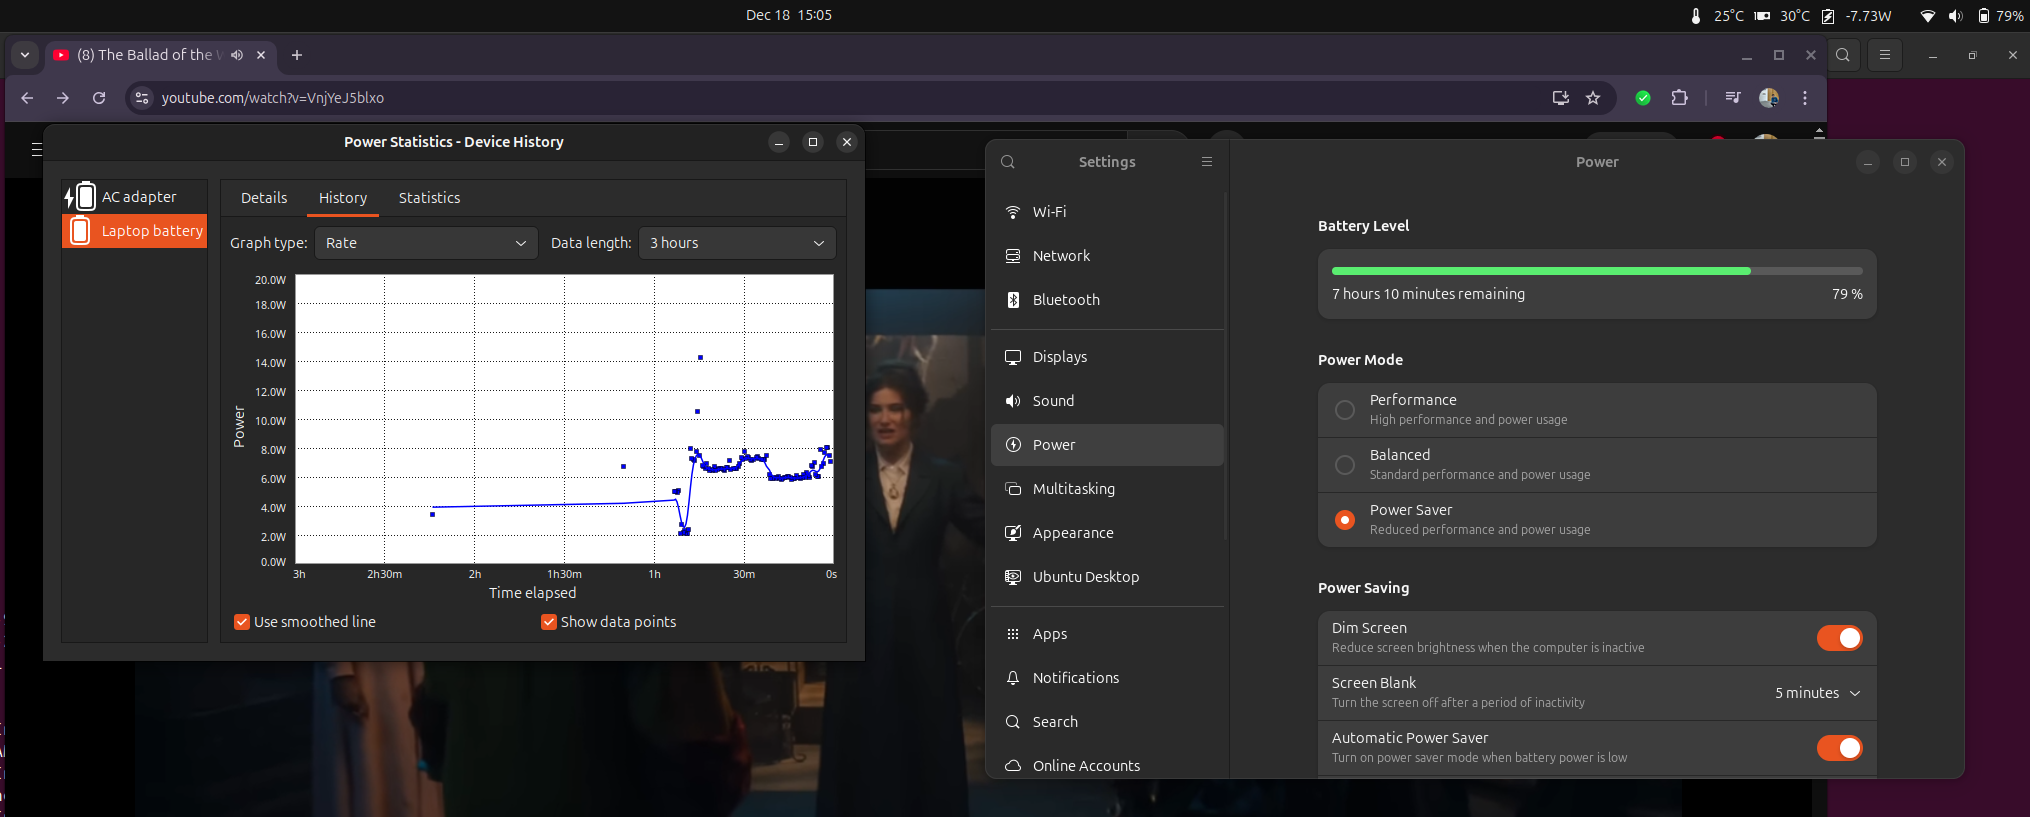
To reduce battery usage, you can switch to integrated graphics using supergfxctl -m Integrated and reduce the monitor refresh rate to 60 Hz. A logout is required for GPU change. Able to get a power consumption of ~7W during light usage, such as browsing and video playback. While this is not a thorough benchmark, achieving 7W consumption on a 73Wh battery gives atleast 8–9 hours of battery life.
I managed to get KVM with Ubuntu running at ~8.3W of power consumption, which is impressive considering that the HX370 processor is designed to be power-efficient.
You can switch to Hybrid mode using supergfxctl -m Hybrid. However, there is a drawback: the default GPU in this mode is the dGPU (Nvidia 4060), and the display manager is rendered using the Nvidia GPU. Also when you switch to Hybrid, X11 will be your display manager instead of wayland. Unfortunately, I was unable to set the iGPU as the default and use the Nvidia GPU solely for offloading rendering tasks.

Additionally, asusctl had issues starting up and was unreliable in my setup (it do not support ubuntu officially). It worked randomly, so I am not using it at the moment. If someone manages to get it working consistently, it could enable features like adjusting fan curves and other performance settings.
Lastly, with supergfxctl -m Vfio, you can attach the Nvidia GPU to any of your VM machines, which is a useful feature for virtualization. You can use the gnome shell extension gpu-supergfxctl-switch to quickly change from the settings. For more detailed configurations follow Vfio guide.
You can follow up on this if you want to explore the VM options
